Just posted a new video up on our you tube channel. The video is a how to of Taylor swifts hair from the peoples choice awards from 2010. In this video you will learn how to Recreate Taylor Swift's hair (updo / faux bob) from the peoples choice awards. This is a really quick and easy hair style up do. Perfect for any prom hair, wedding hair, special occasion hair or if your going on a date hair.
This 10 minute how to hair video will show you step by step how to do Taylor Swift's hair. Perfect for you to do on home or on a friend. Also perfect for stylists to do in the salon. You can give your clients this perfect updo in under 10 minutes.
Hope you enjoy! Any Questions? Just ask by emailing or commenting.
Thursday, February 25, 2010
Tuesday, February 23, 2010
Is Your Hair Broken, Fragile or Distressed?
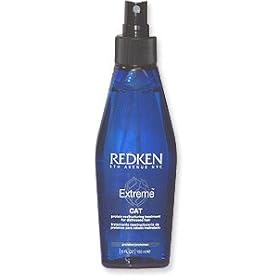
Hello everyone! I was at the salon today and repaired a clients distressed hair; and for the first time I used Redken's CAT Conditioning Treatment. I am in LOVE! If your hair is broken, fragile, distressed or snapping, this is the product for you.
It's a quick treatment that takes no longer than 5 minutes. However, you can repeat the treatment up to 3 times to increase the strength to the hair.
I will do a product review video for this product soon and give you guys a great explanation of when and how to properly use it. BUT! If your hair needs help now. Redken has a great database that includes all of it's salon's (Including my salon in the Palm Beaches: Salon Essencia) so you can find the one that is closest to you. Click here to find your Redken Salon and have a salon professional get your hair back in shape!
Sunday, February 21, 2010
Behind The Scenes & Future How To Videos
Here is a quick sneak peak of the latest photo shoot from The Hairstylist Blog.
The style was fast, easy and fun. Be on the look out for photos of the shoot in March, but most importantly be on the look out for 2 new videos inspired by this shoot to be posted on The Hairstylist Blog.
We are going to teach you how to:
This is just a quick little video, but you get to see the hair!! We can't wait to show you how to recreate this look!!
The style was fast, easy and fun. Be on the look out for photos of the shoot in March, but most importantly be on the look out for 2 new videos inspired by this shoot to be posted on The Hairstylist Blog.
We are going to teach you how to:
- Recreate the look shown here
- Create a more commercialized style of this look that you could wear everyday
This is just a quick little video, but you get to see the hair!! We can't wait to show you how to recreate this look!!
Saturday, February 20, 2010
3 Bob Do's & Dont's
At the salon often times there are many principles I live by with each of my hair cuts, wither it's a version of a bob or a long layered hair cut. By following these principles it allows me to really take that cut or style to another level and really help to create a better personalized cut. So next time you are going to the salon and getting a bob haircut or a version of the bob, take some of these tips into consideration. Especially for those of you who are doing the cutting!
Bob Do's:
1. Always have softness to the weight point of your bob (the point where the hair becomes one length from the point to which it is stacked). A great way to create this look is to add texture to the ends of your hair by using your texture or thinning shears. The softness makes your eyes move more to the over all shape and less to a blunt line that is often created from this hair cut.
2. Blow dry your bob with a flat brush (square or rectangle brush, sometimes known as paddle or vent brush). Brush the hair in the opposite ways of which it falls when blow drying. This helps to give you a more natural looking bob.
3. Try some form of asymmetry for most all symmetrical facial shapes. A great way to do this is with side bangs or a side part and allowing one side of your bob to lay a bit heavier than the other side. Asymmetrical does not mean that your hair cut has to be longer on one side than the other, it just means it needs a point to which one side is different than the other. Make sure to check out the last blog posting to learn more about side bangs.
Bob Dont's:
1. Do not have a true layer to your bob cut. Instead try a textured (random peicey hair) layer. You can create this by over-directing (pull all the hair to one location) the hair to the top of the crown (top point of head) and use a texturizing cutting technique to break the hair up.
2. More often than not I never leave the front corners of a bob to blunt (A very hard edge). Instead create a softness around the face. Even on a blunt bob it can be very harsh around the face and can often make the cut seem helmet like. Instead create a more softer look by slightly rounding or texturizing the front corners of your bob style.
3. When having highlights on your bob style, never highlight underneath the point to which your brow arches (but make sure not to exclude the hair around your face). This will help to keep your color more natural looking and especially keep your color from looking spotty.
Friday, February 19, 2010
Can I Have Bangs?
So I get this a lot in the salon. Can I have bangs? The answer probably is yes! Most people look fabulous with a fringe (Bang), its just finding the right bang for your facial shape.
If you are looking for a full bang, it's important to realize that this will create symmetry to your facial shape, especially through the top portion of your face. So if you need asymmetry to your facial shape try a side bang or a swoop bang.
When creating a swoop or side bang, make sure that you are parting the hair further enough to one side to give your hair the right length to swoop over, a middle part or a part very close to the middle will not work. A great reference point for creating that perfect side or swoop bang is to part your hair at the point to which your brow arches.
Now Style Those Bangs!
Full Bangs
Blow the hair dry one way for 30 seconds the other way for 30 seconds and then straight down until they are completely dry; this will keep the hair from parting and give you more control.
Side Swept Bangs
Blow dry the hair the opposite way to which they fall and roll them under with a round brush.
-Gregory
Tuesday, February 16, 2010
Welcome to The Hair Stylist Blog!
Thank you for checking out The Hair Stylist Blog. Starting March 1st our official website, TheHairStylistBlog.com, will launch. I am so excited to be a part of such an amazing team of hair stylists to share our knowledge and ideas with the world. I can't express enough about how truly excited I am! I look forward to sharing all my ideas and thoughts with all of you!
Thank you so very much
-Gregory
Thank you so very much
-Gregory
Subscribe to:
Comments (Atom)


